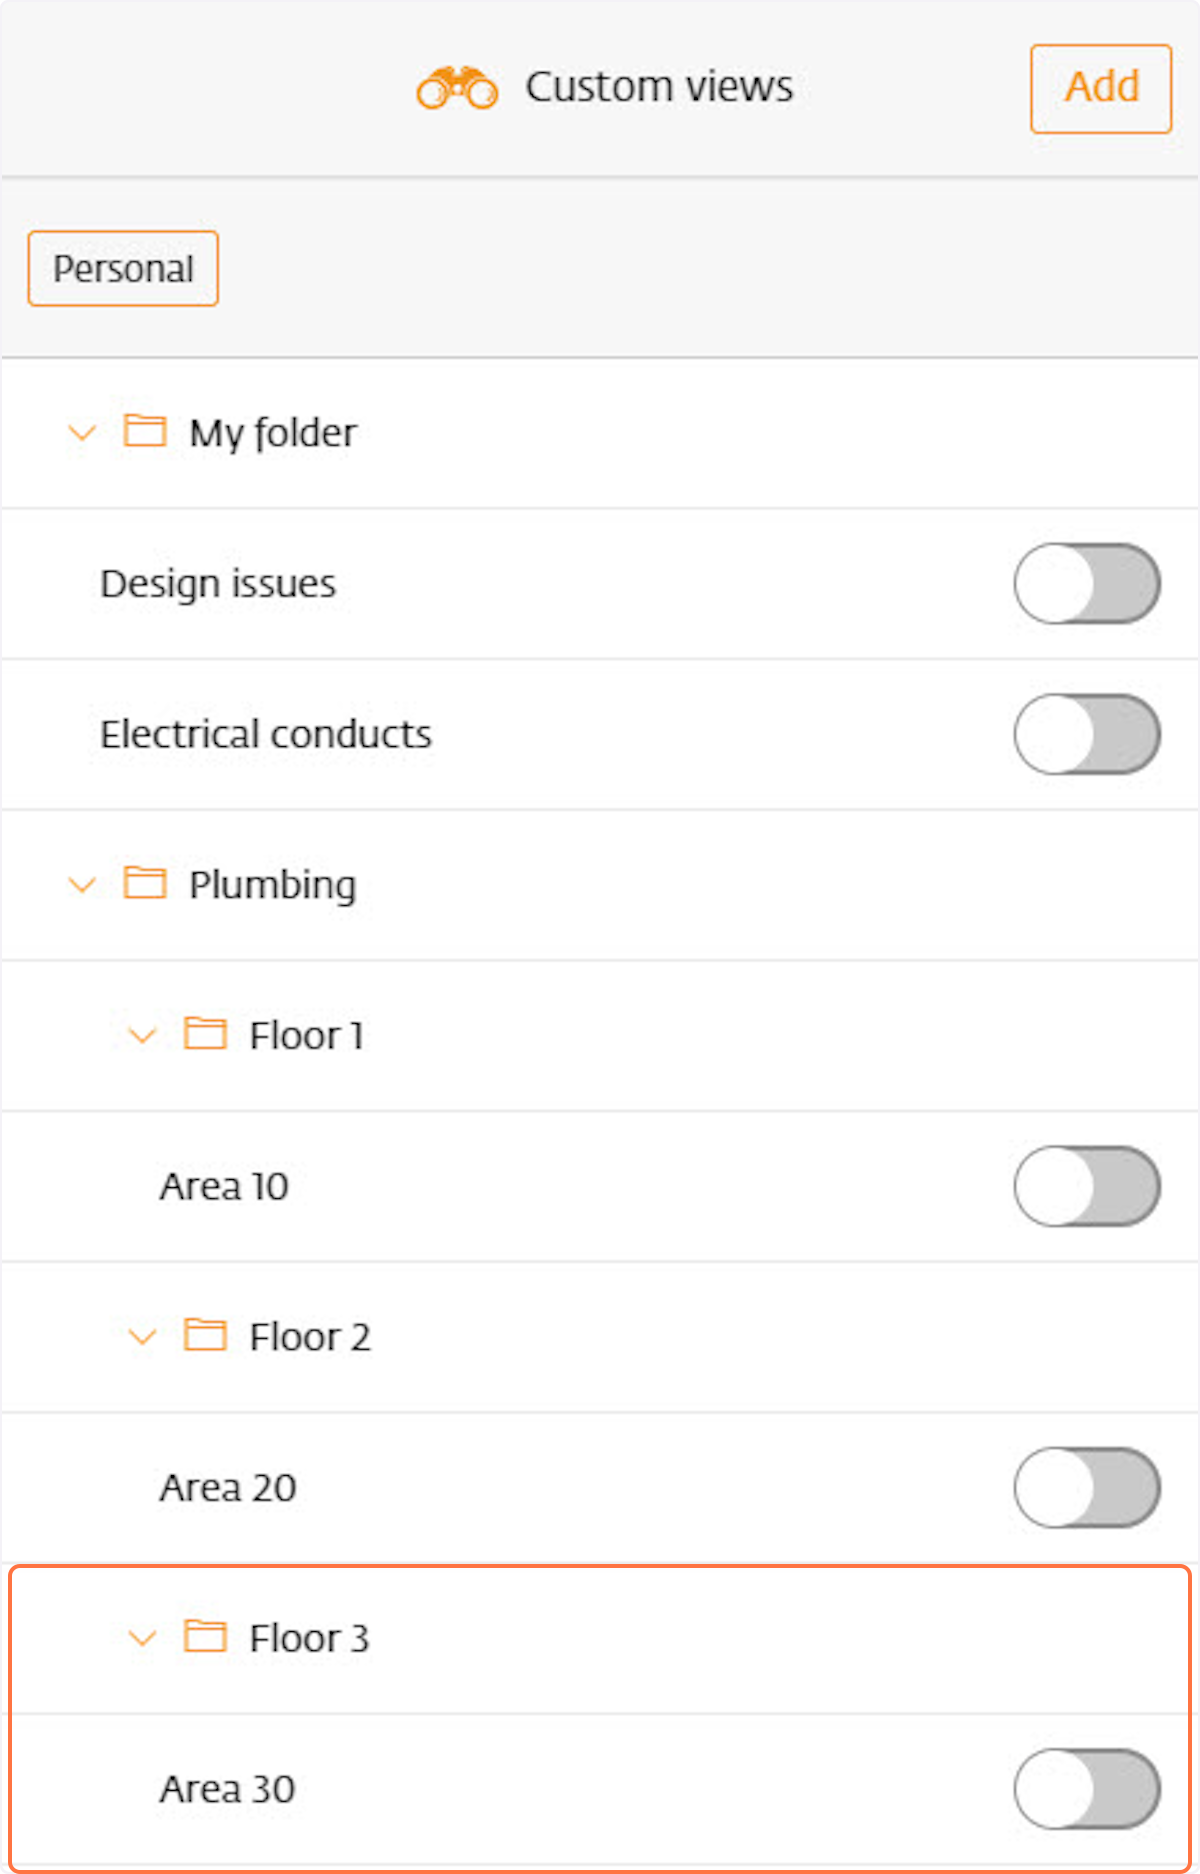
With Custom views, you can predefine views in StreamBIM.
This can be used for purposes such as:
-
Tailored views for different disciplines
-
Order plans
-
Creating multiple "home" positions within the project
-
Points of interest
The purpose of custom views is to simplify the user experience in StreamBIM by reducing clicks. With well-structured custom views, users can easily switch between them, accessing the exact information they need at any given time.
Example of a custom view for procurement planning of columns
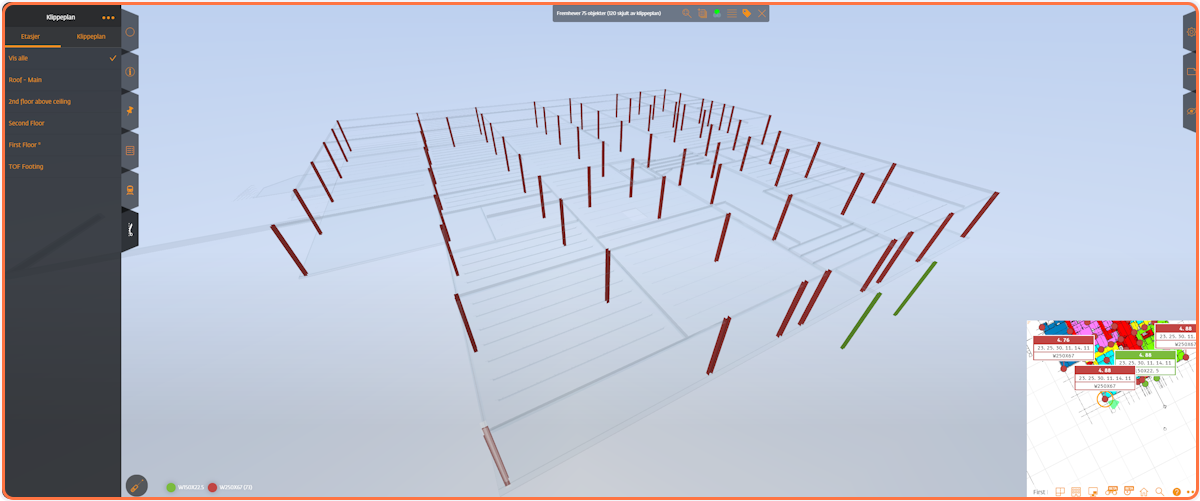
1. Click on Clipping plane
We want to filter out only the columns for the first floor in the project
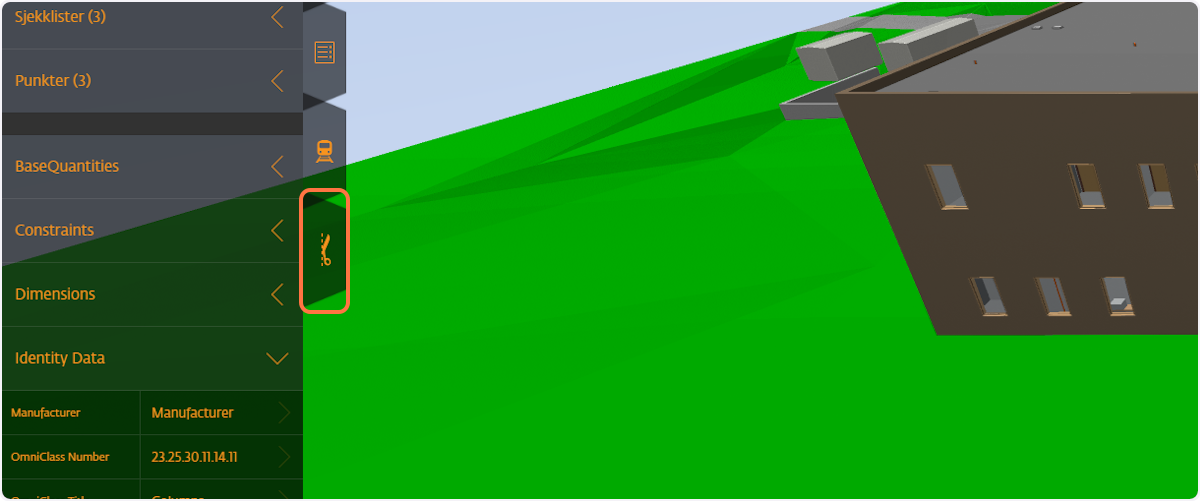
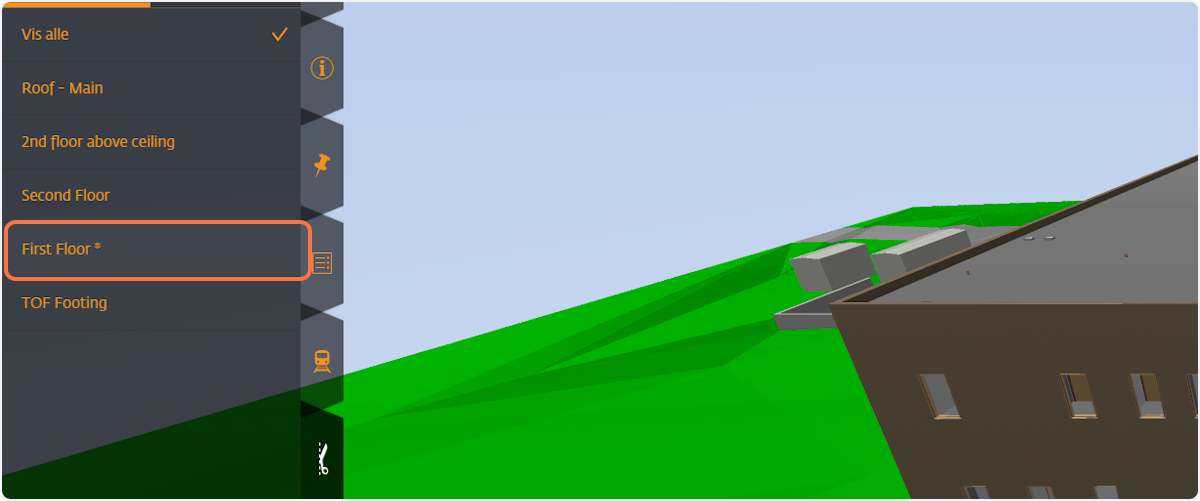
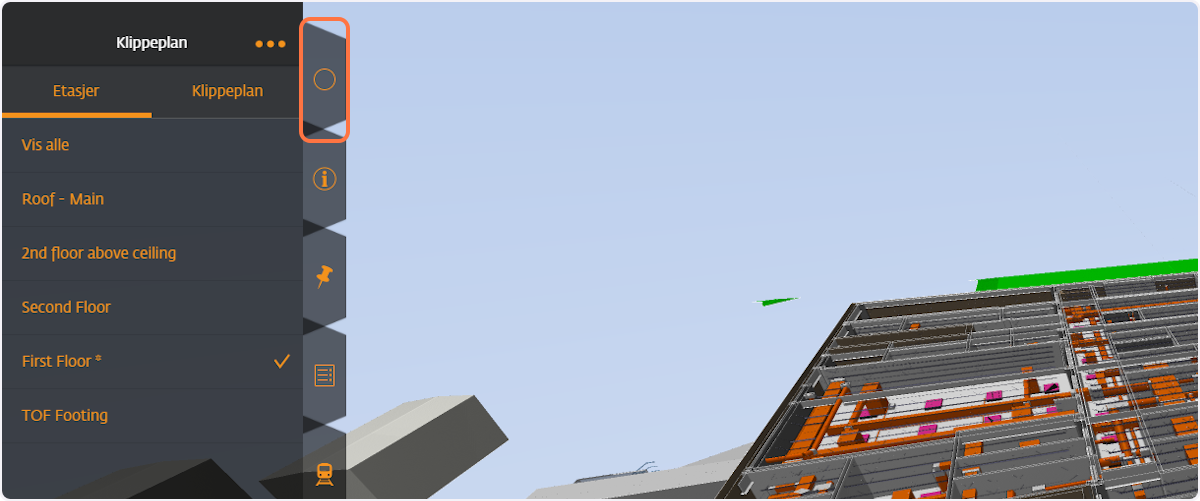
2. Click on First Floor
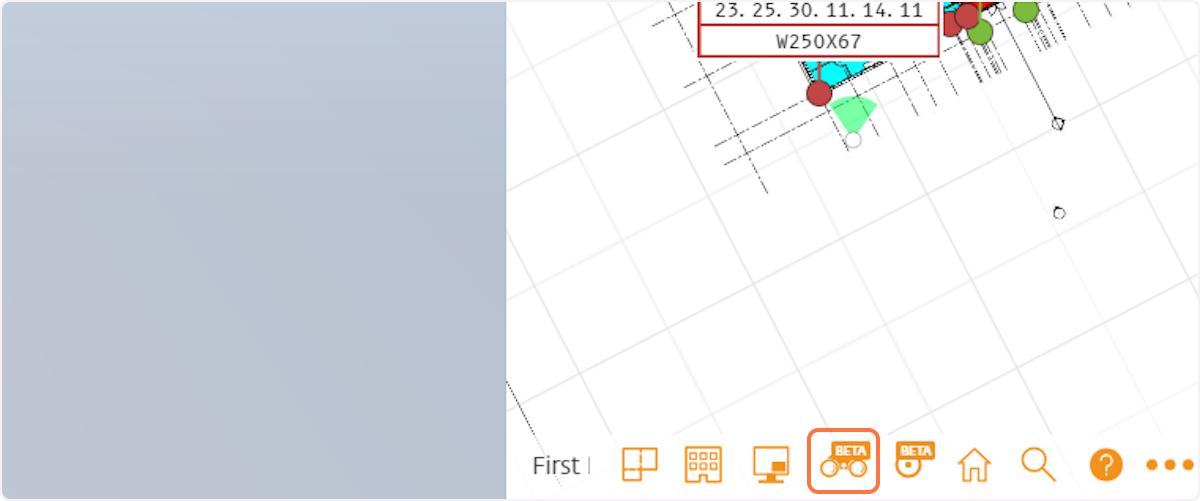
3. Click on 3D-streaming
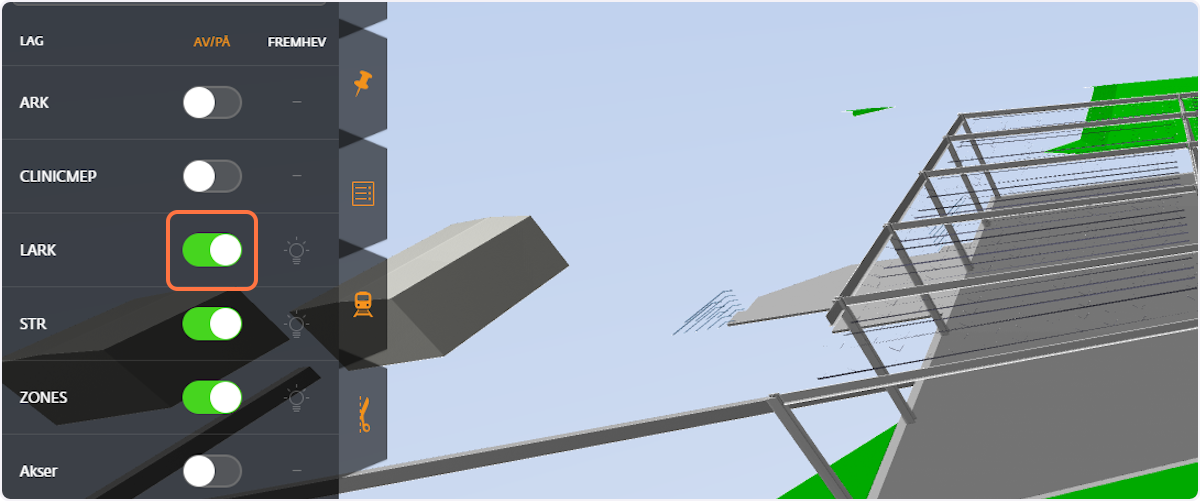
Now we want to turn off the model layers that are not relevant for this purpose
4. Hide the model layers you don't want in the view
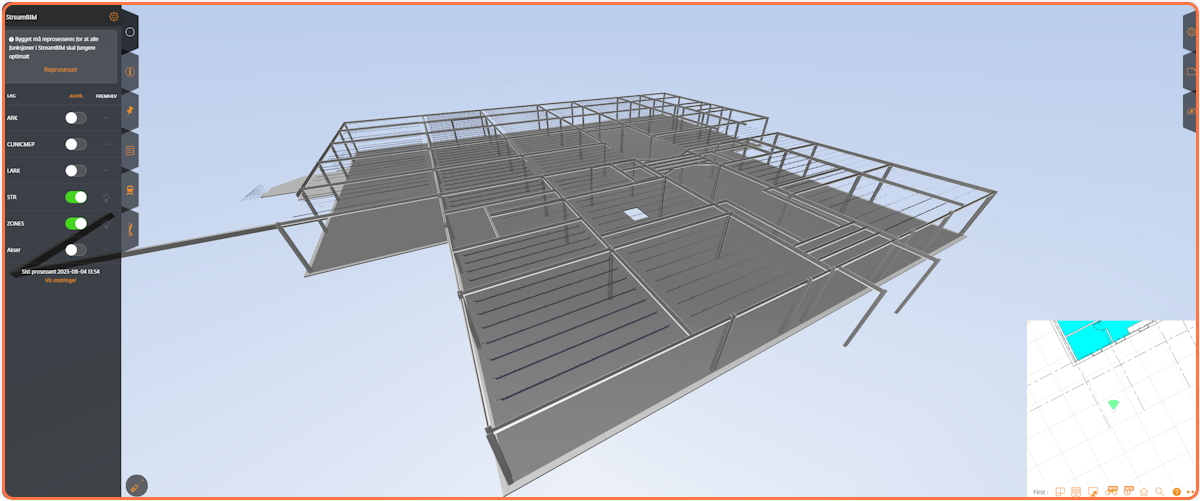
5. Set the camera position
We set the camera position that best represents the objects we want to filter on
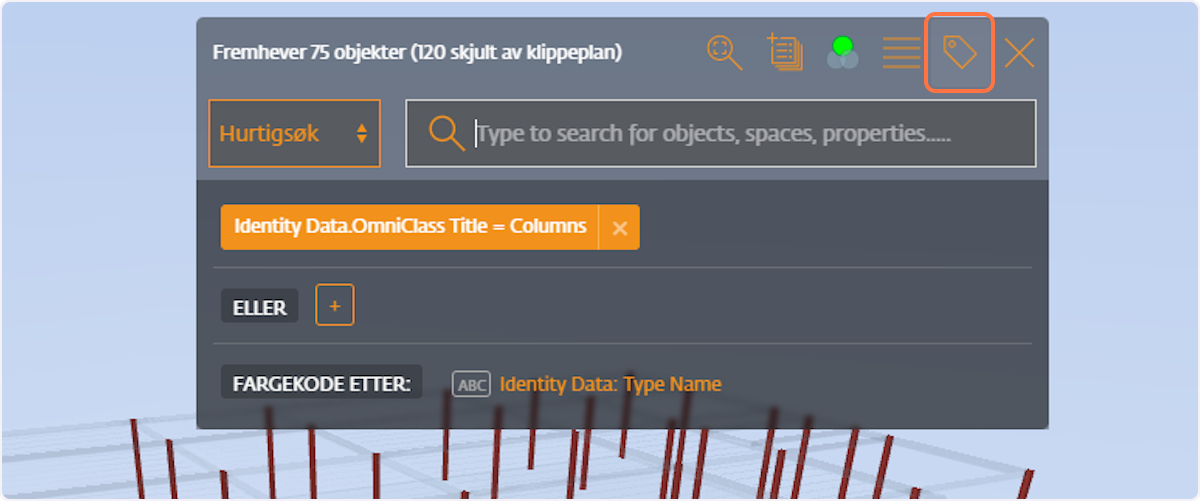
6. We filter on columns by clicking on a common value of those objects
This will isolate only columns present on level 1
7. We want to colorcode the objects based on dimensions, click on the property name to do so
We use this property because it represents the different types of columns in the project

8. Add object tags to your view
We do this to save tags in 2D to be used in field
9. Click on Type to add columns...
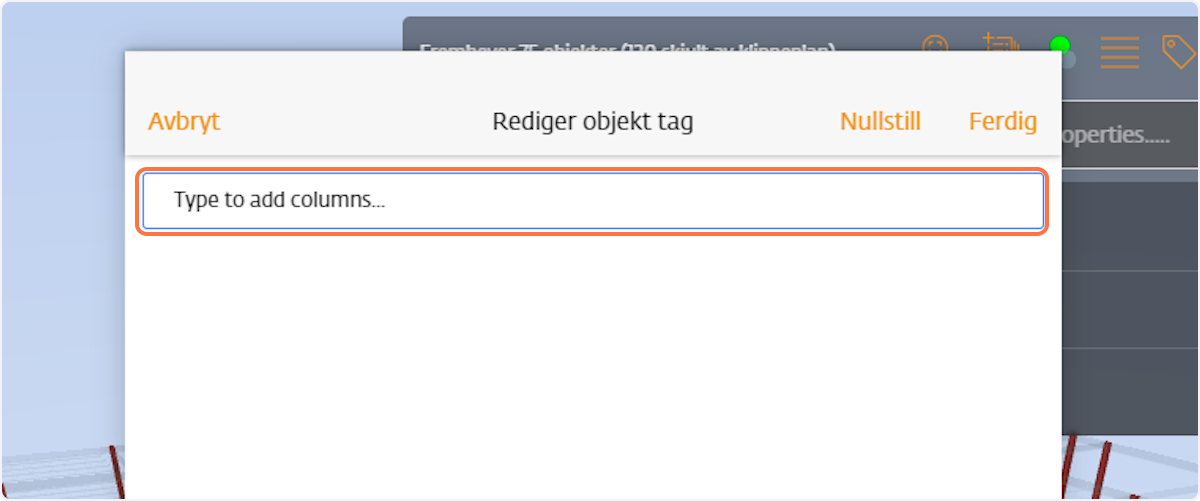
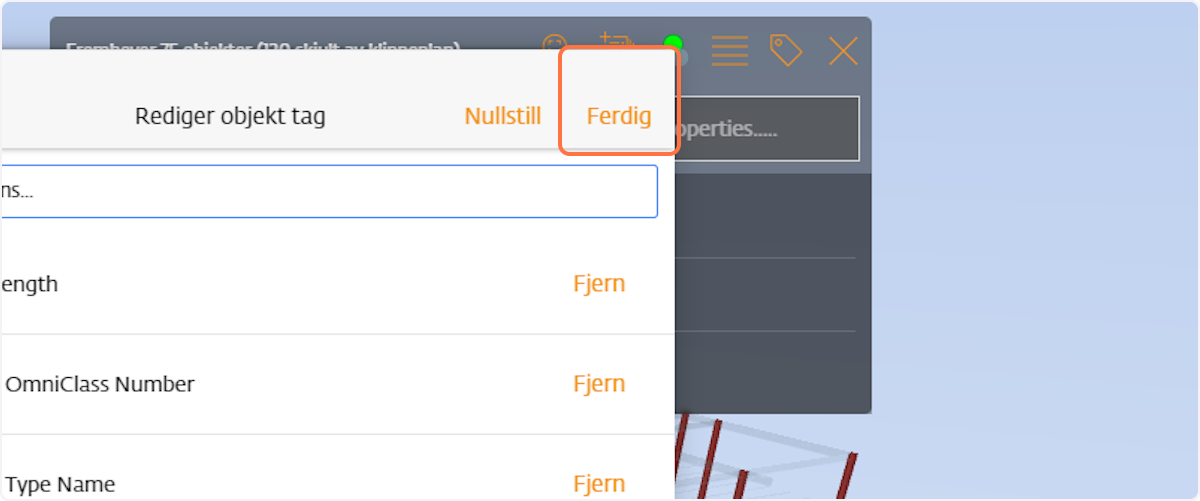
10. Add the properties you want to tag, and click done
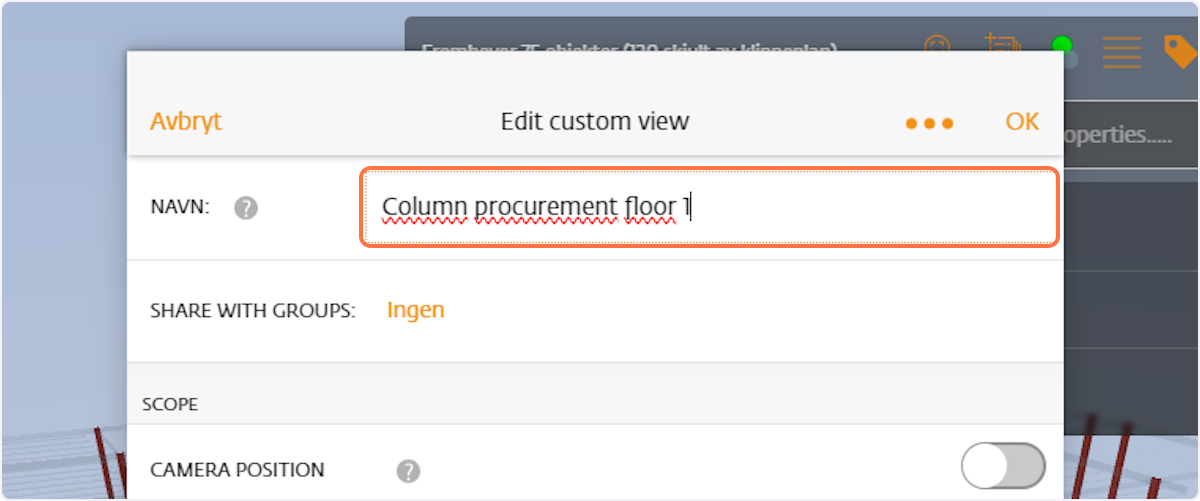
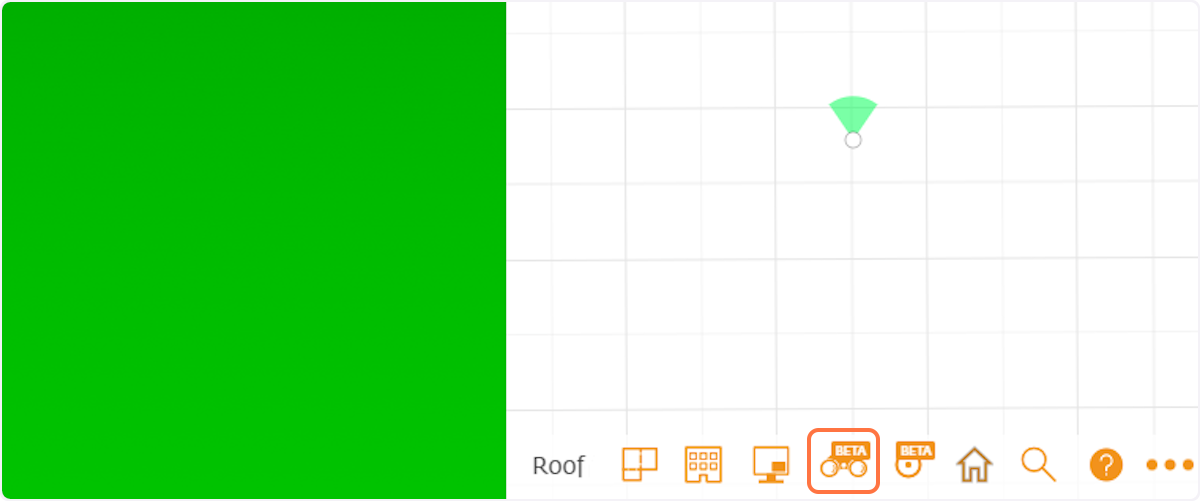
11. Click on Custom views to start the setup of your view
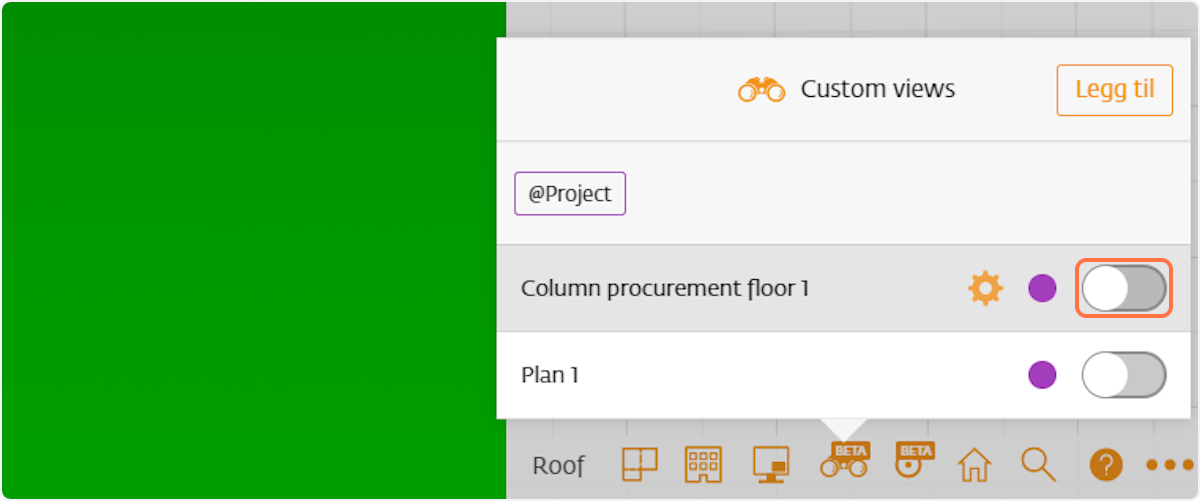
12. Click add to create a new custom view

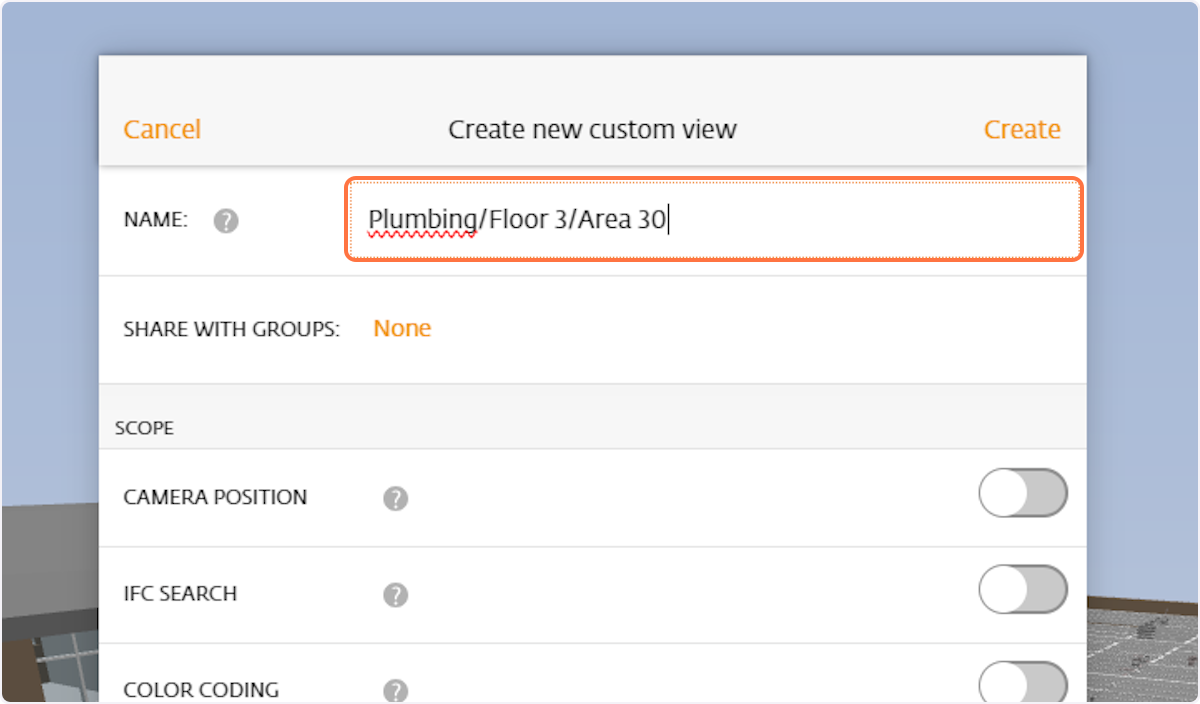
13. Type in the name you want for your custom view
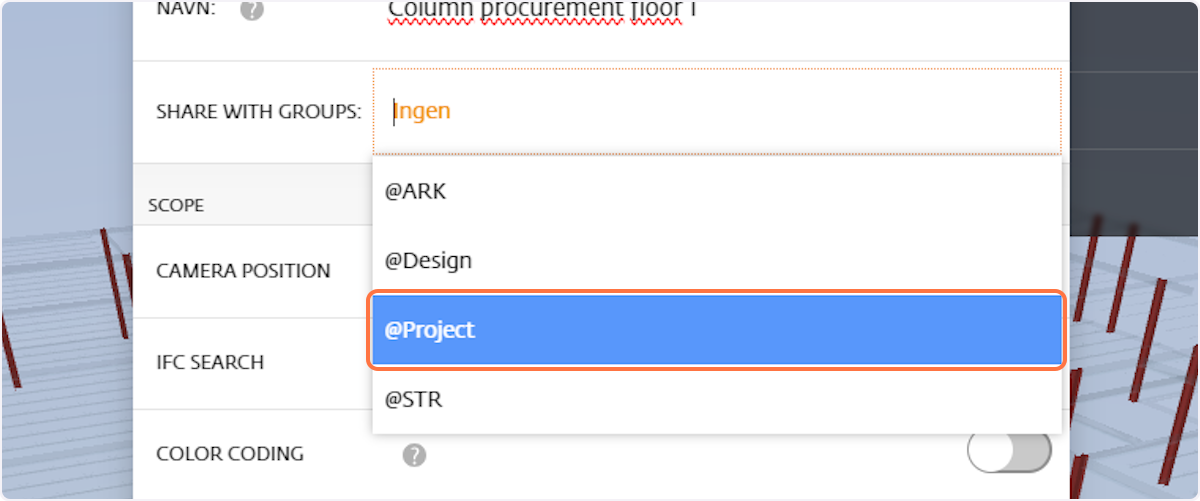
14. Pick who to share the custom view with
You can either share the custom view to a specific group of people, the whole project, or keep it personal for your account
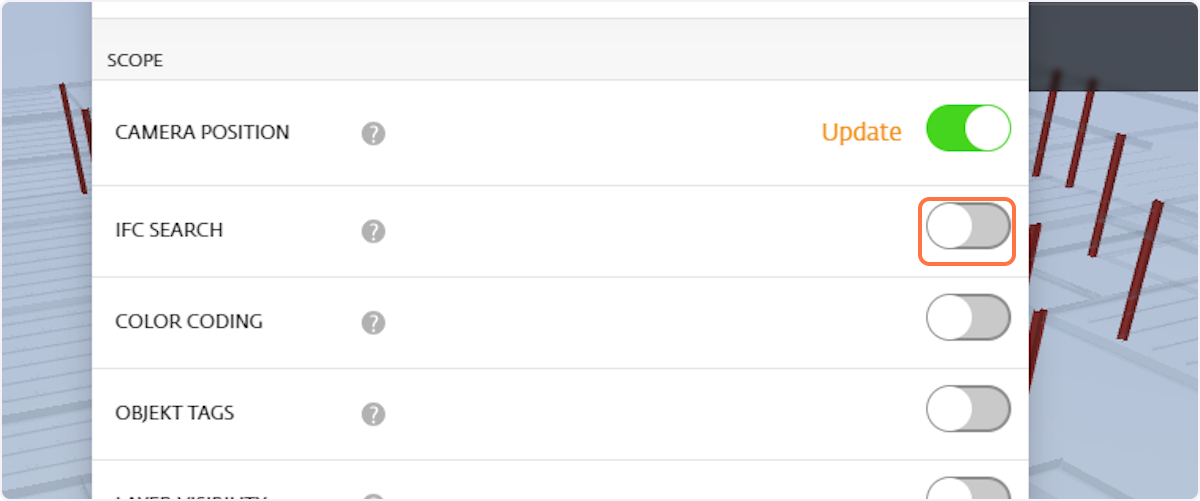
15. Add camera position
Saves the current camera position and orientation

16. Add IFC search
Saves the active IFC search results and filters
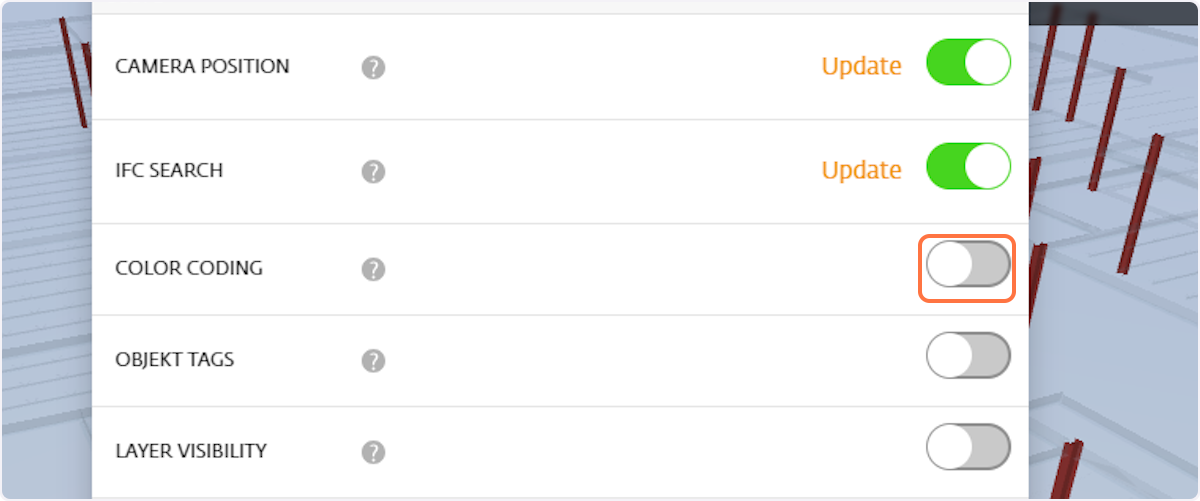
17. Add color coding
Saves the active color coding of your IFC search
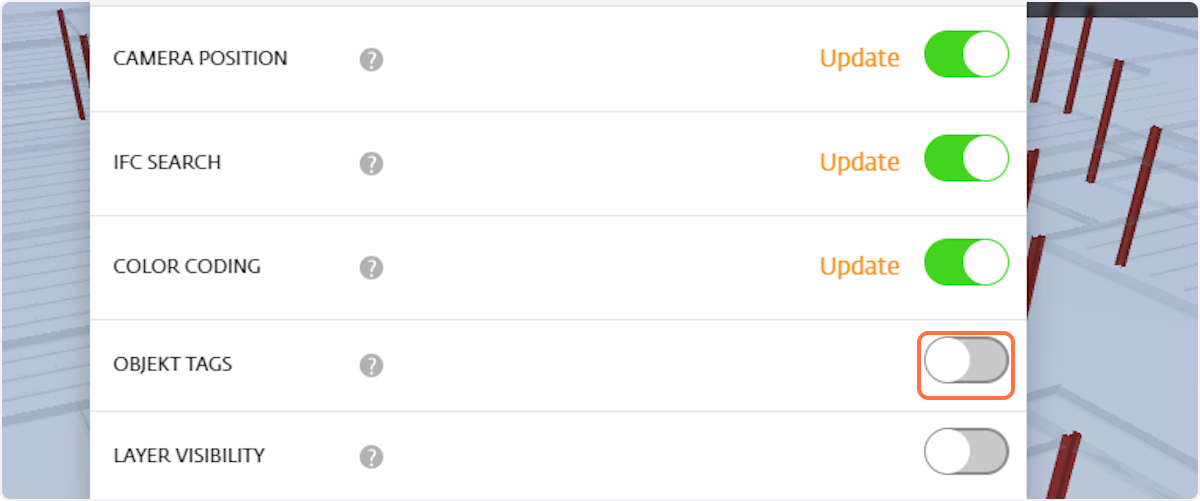
18. Add object tags
Saves the created object tags for the active IFC search
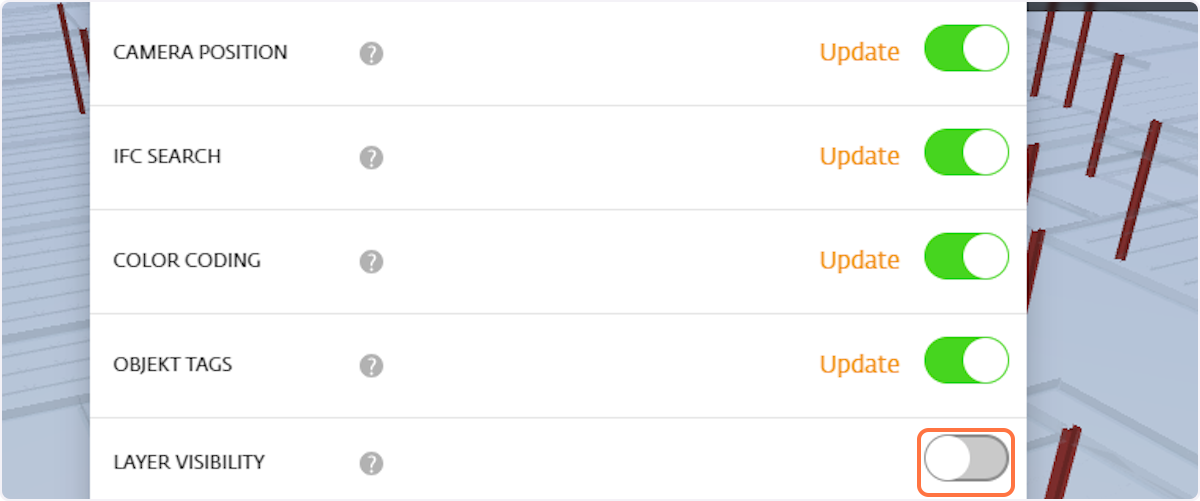
19. Add layer visibility
Saves the visibility status of your model layers (hidden or visible)
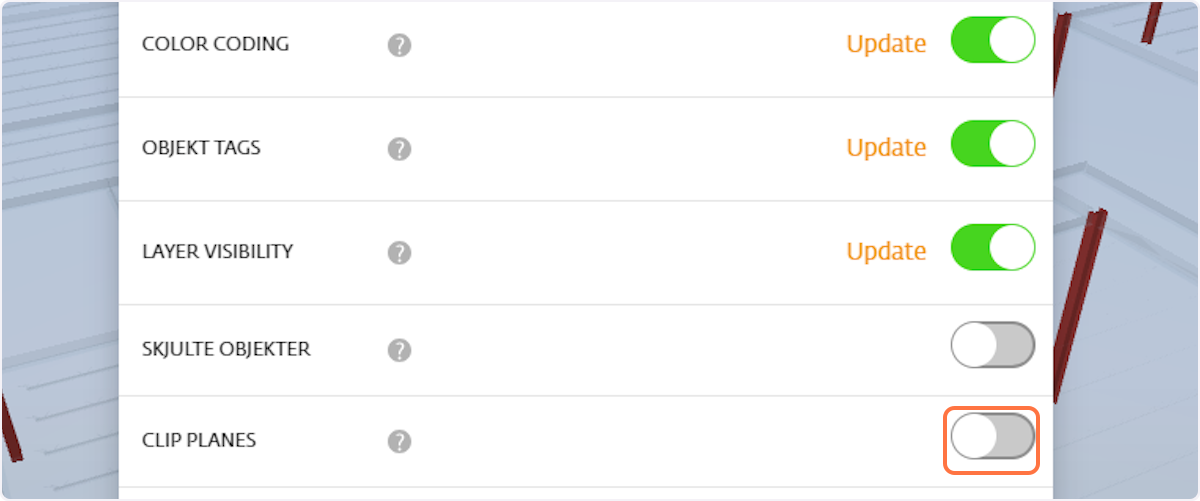
20. Add clipping planes
Saves the active clipping planes
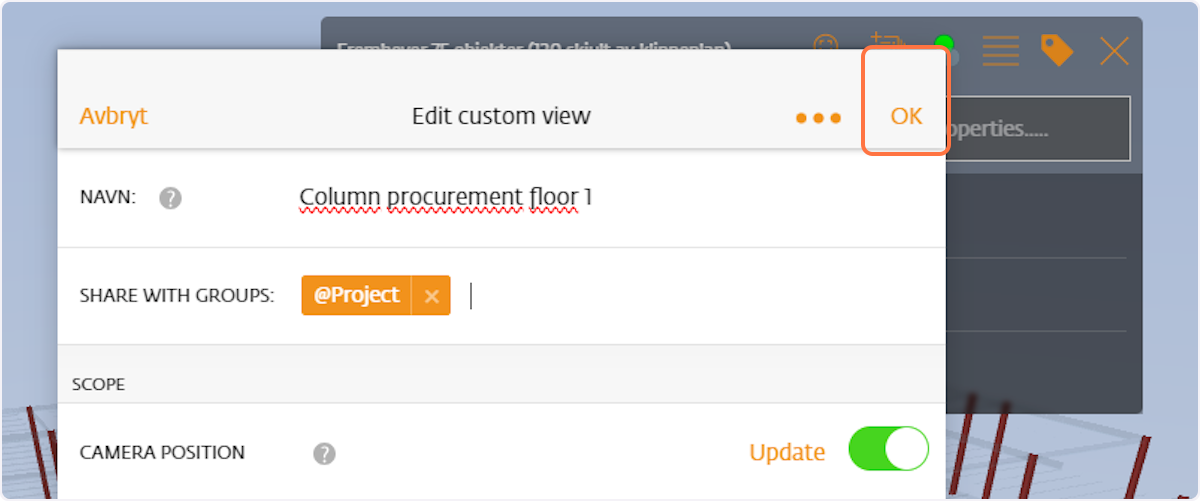
21. Click on OK to save your custom view
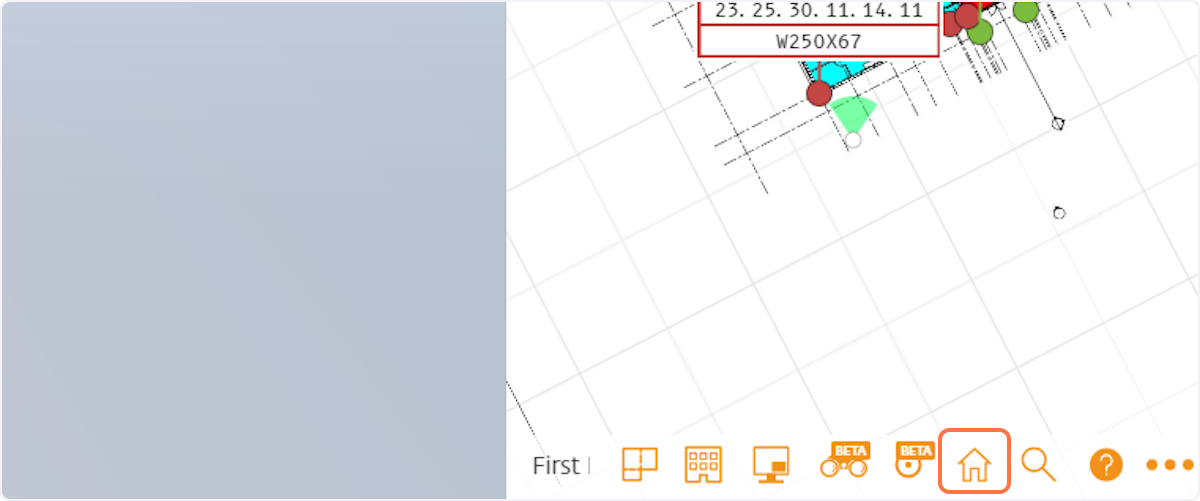
22. Test the custom view by clicking the homeposition button to reset everything
23. Then click on custom views
24. Activate the custom view you just created
25. Voila!
The view is now saved with all the parameters you selected. The view can now be accessed by the whole project, and used for it's intended purpose
26. This is an example, use / to create folders
27. This way you can structure up your Custom views very nicely :)