
Groups in StreamBIM serve as a utility to effectively share topics and workflows to a group of people. Groups are also used for setting read and write access to folders and files in StreamBIM.

Here’s an example of group organization from our Demo project. Groups are best organized when they fit the information flows and contractual bodies in your project (e.g. @BuildingOwner, @PlumbingContract, @VDC-Design and @HSE).
1. Creating a new group
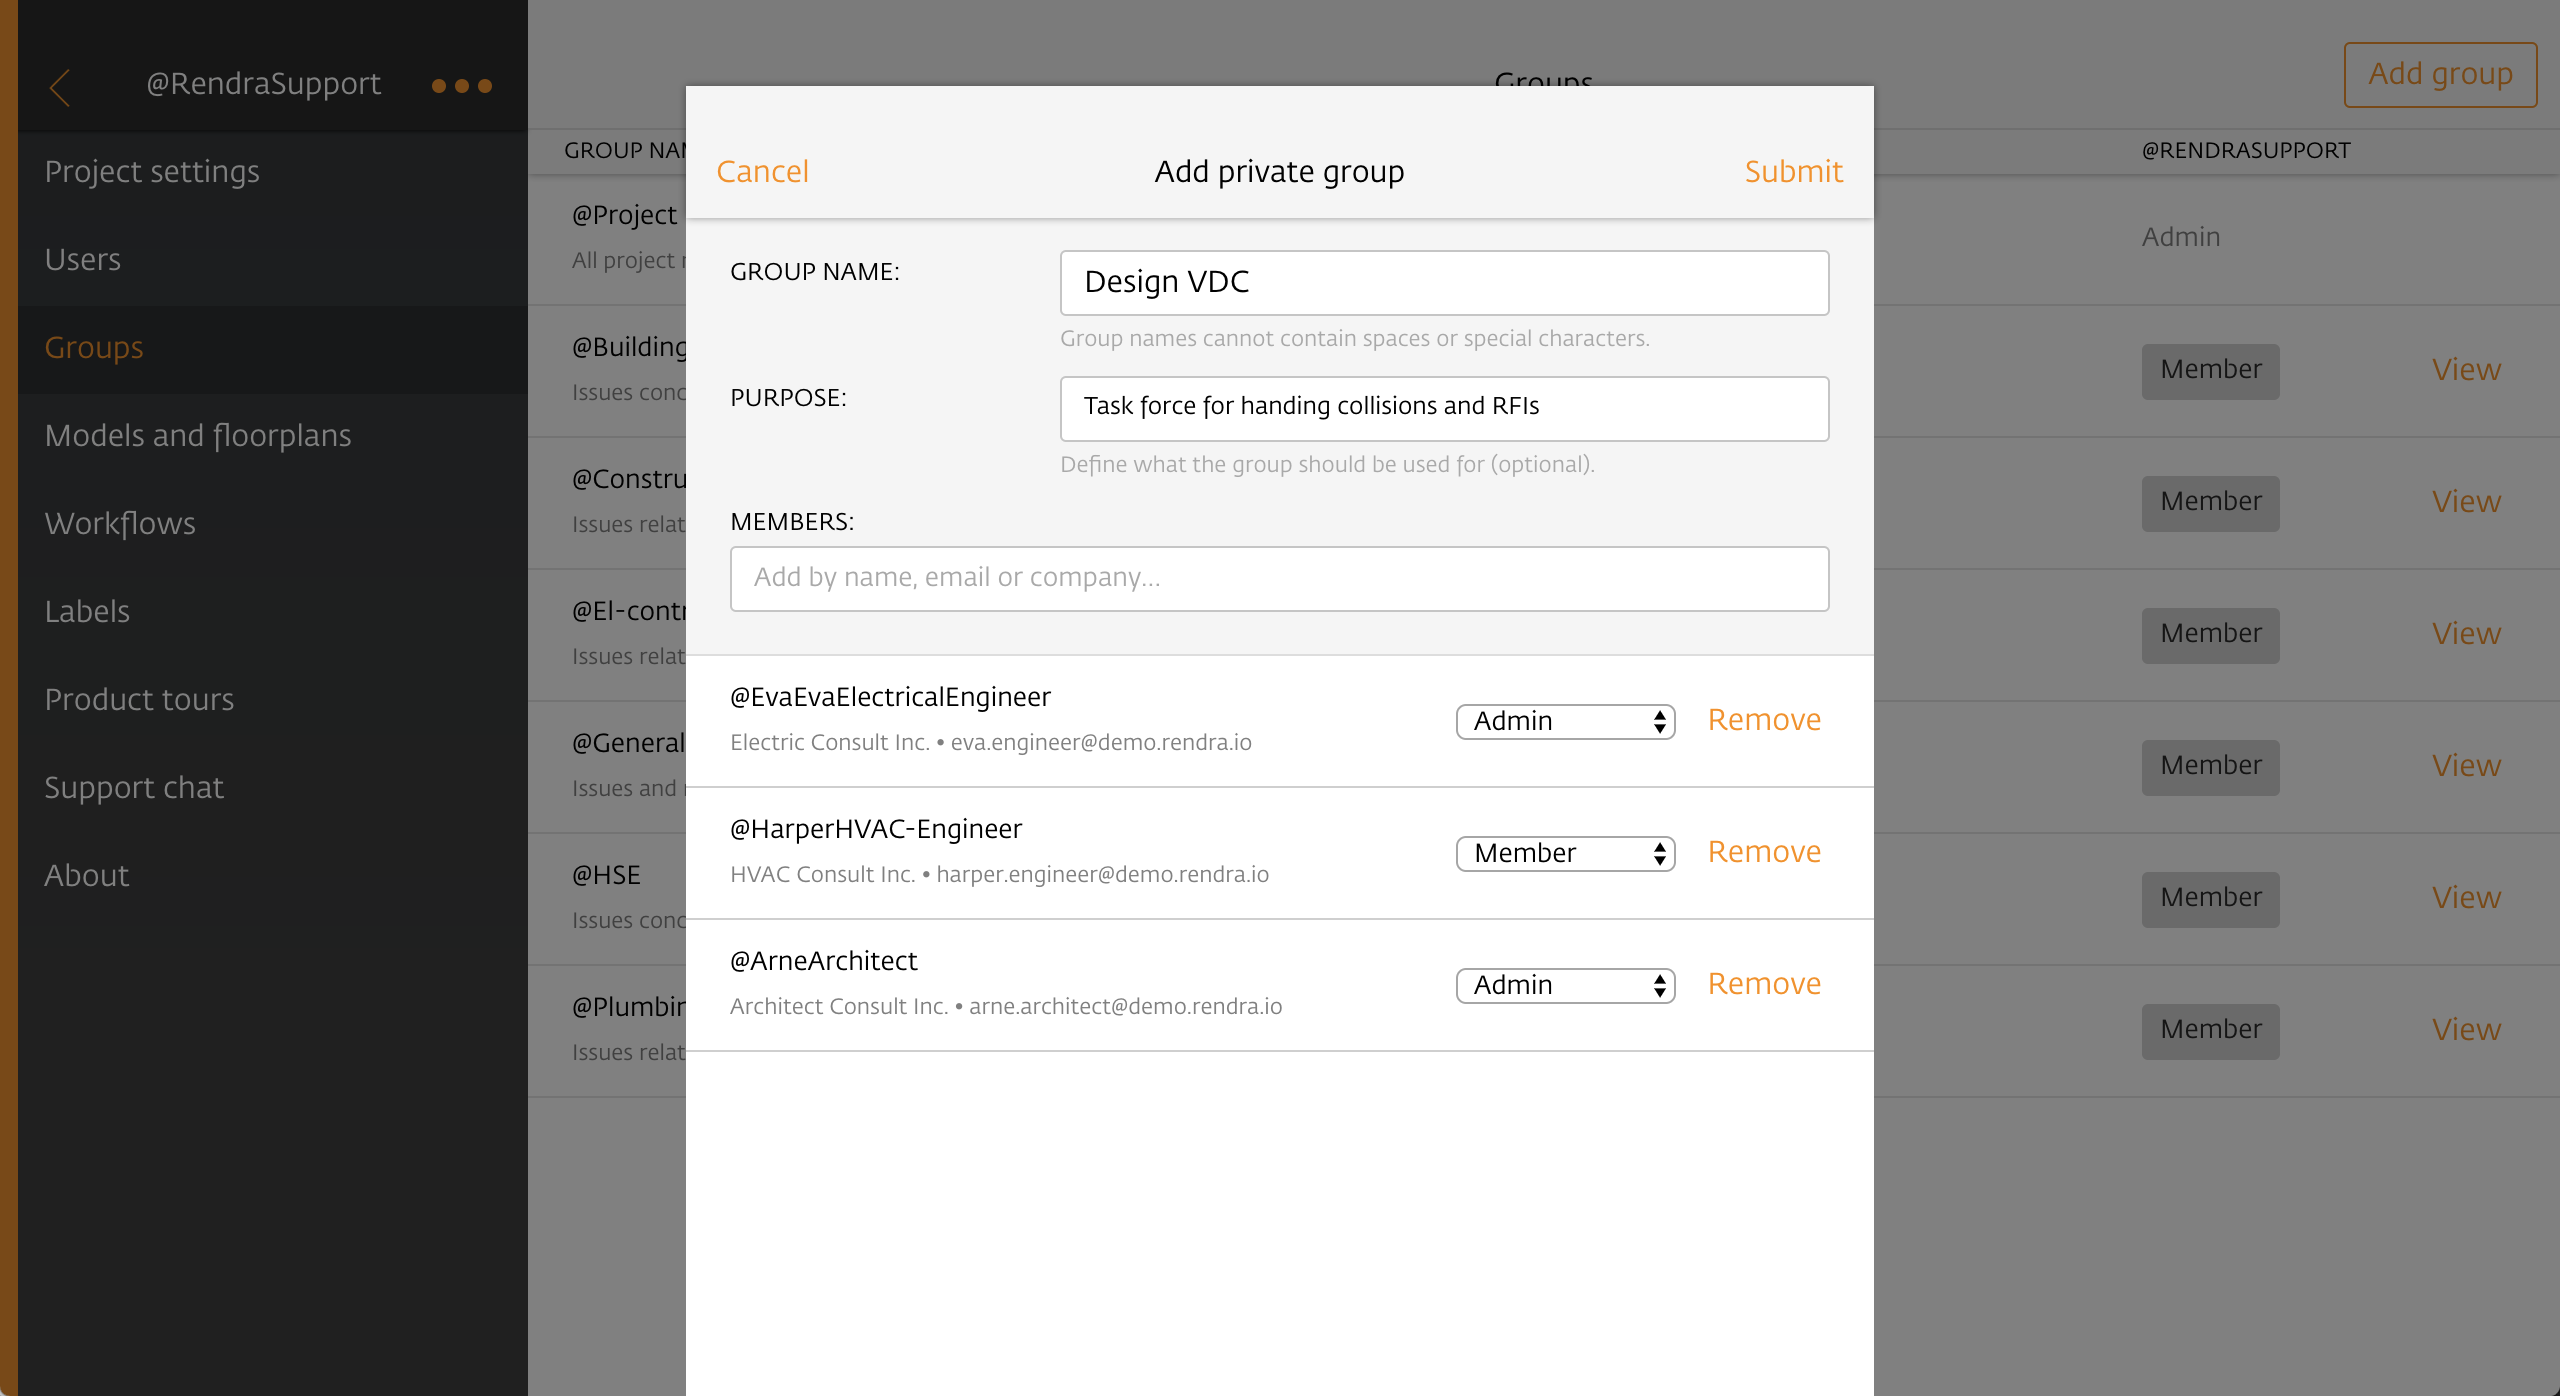
Click the «Add group»-button on the group page. Start by assigning a useful name and a descriptive purpose (optional) in the first two input fields.
2. Adding and managing members of a group
Add members to the group from the «Add members» input field. Members of the group are listed in the list of members. Newly added or removed members will be saved to the group when you press «Submit» / «Save»
See also: Add users to Groups from "Users" overview
3. Admin privileges for groups
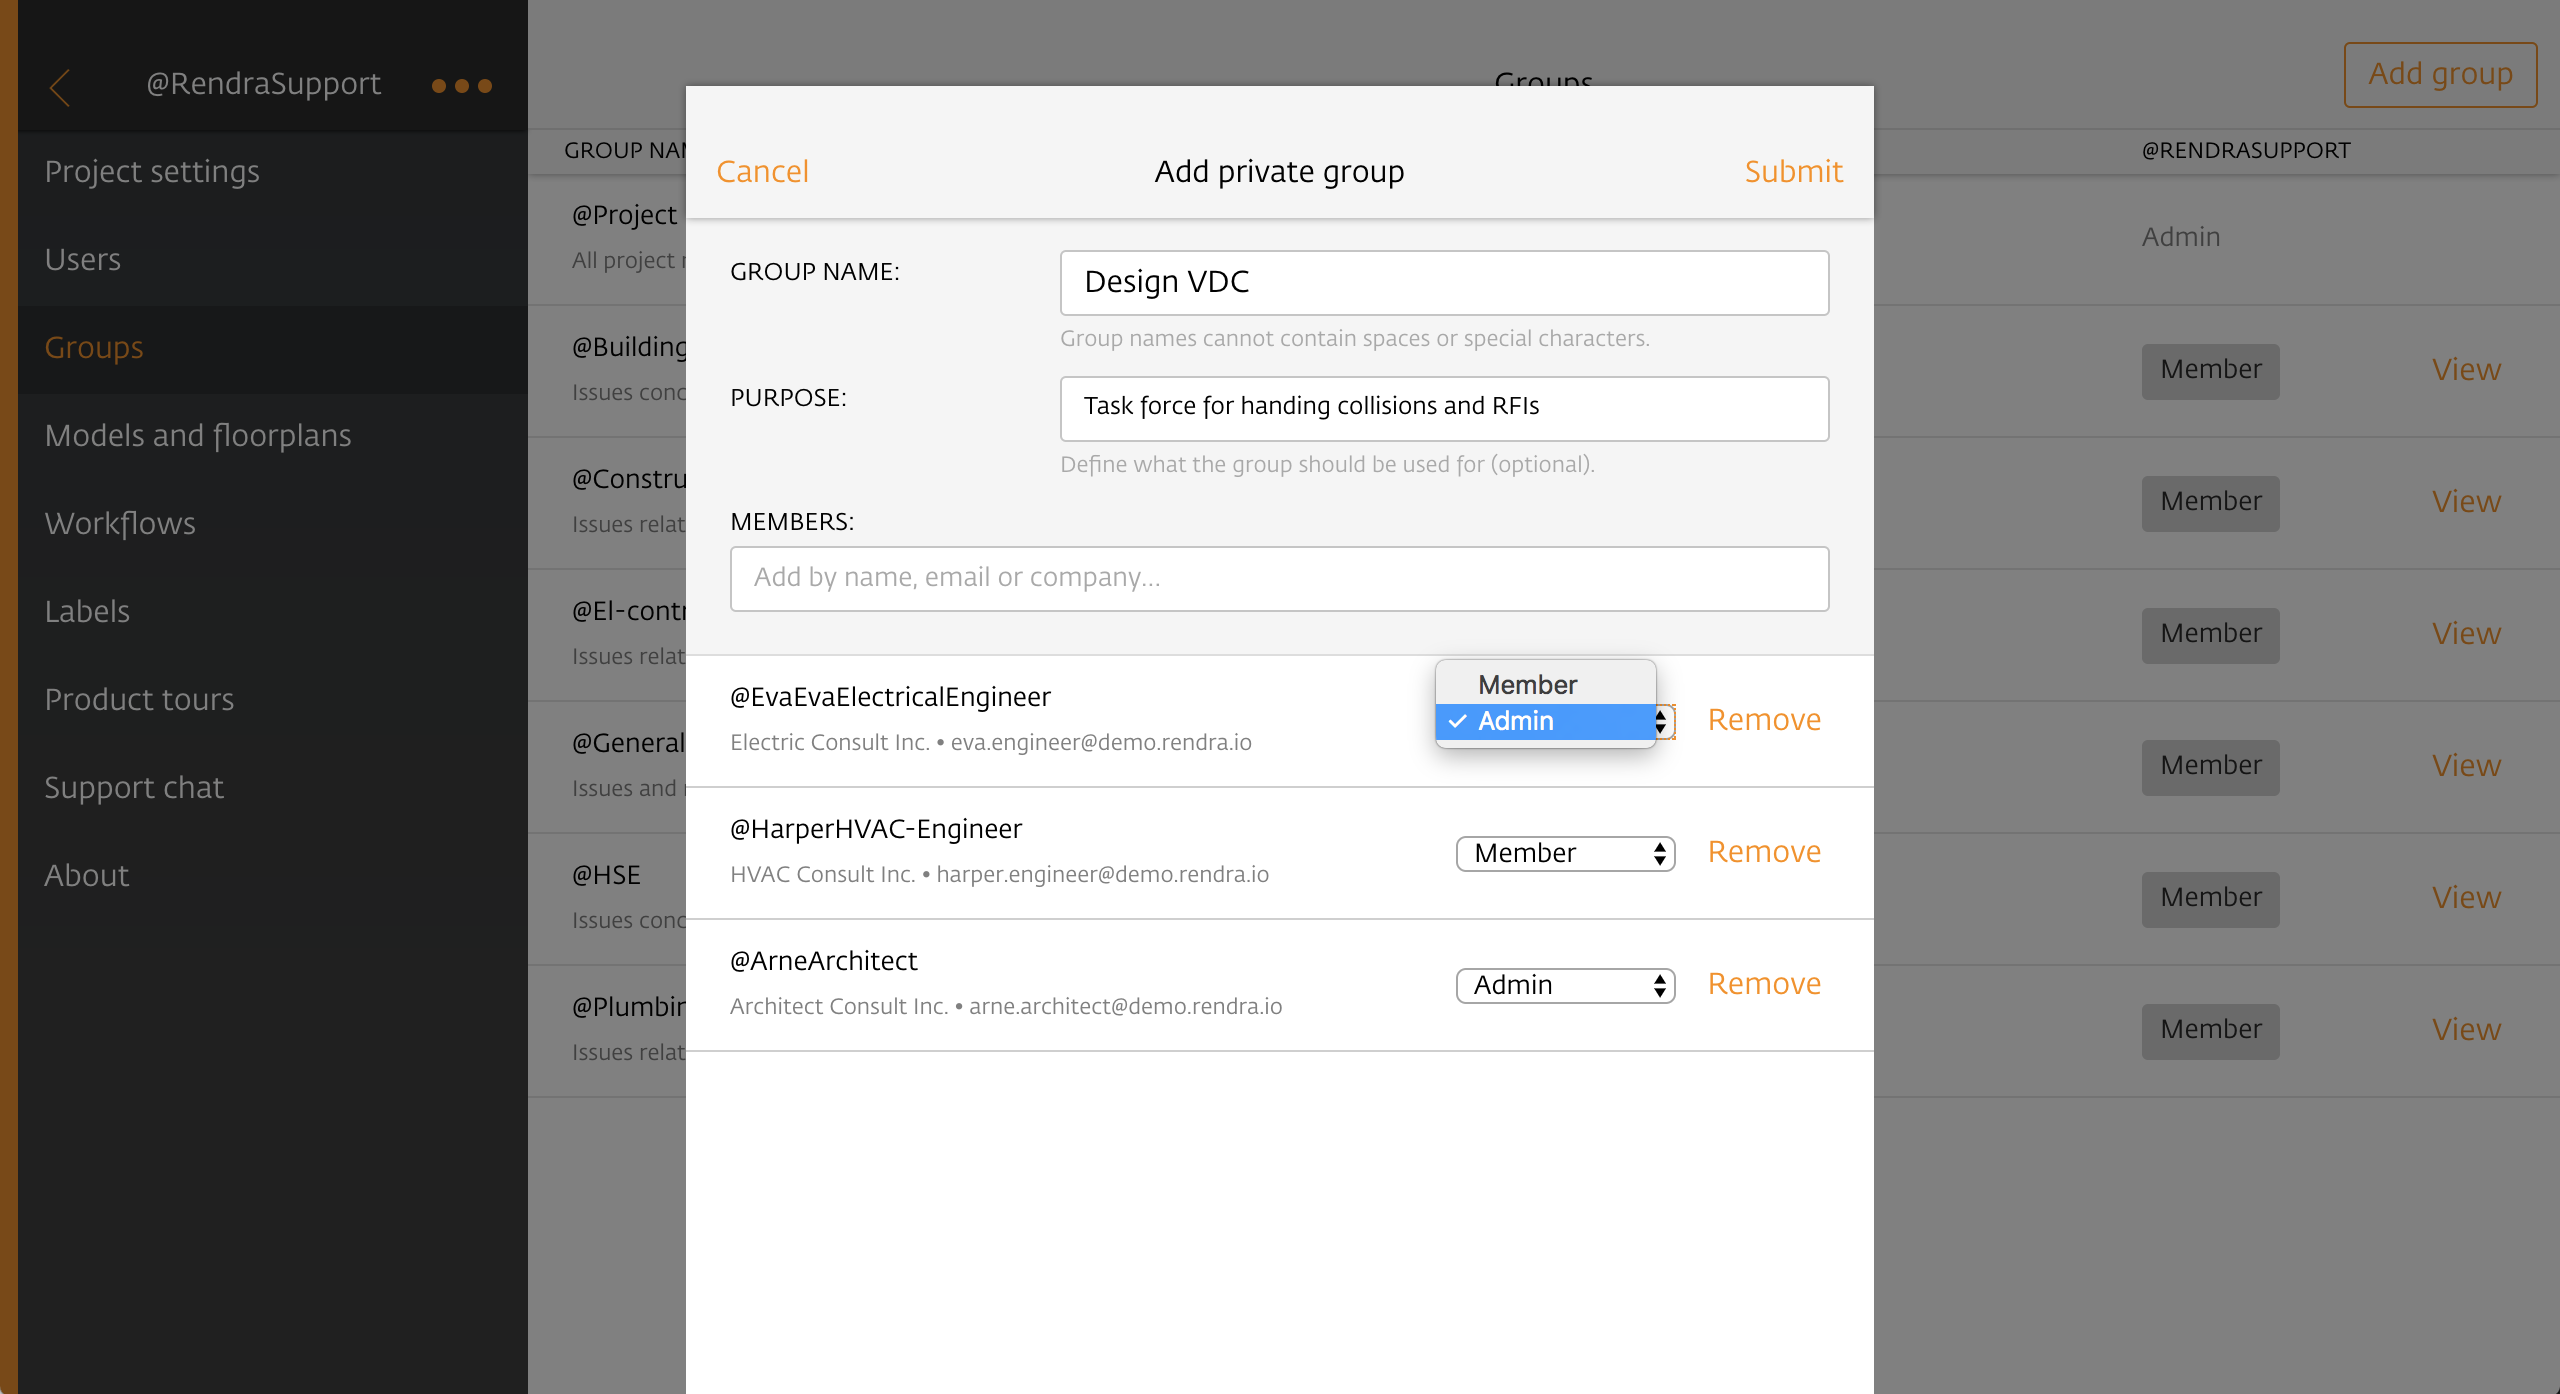
A group admin has privileges to:
- Edit the group’s name and purpose
- Add and remove members
- Delete the group
- Assign and remove the admin privileges of other admins.
4. The group «@Project»
The @project group is an automated group that contains all the members of the project. If you invite a new member to the project the new member will automatically be added to the group @project. This group cannot be renamed or edited.